Thursday, April 25, 2013

New Use for an Old Screen

I just couldn't resist it. This old wooden screen frame was just $10 at a barn sale. So with ideas already dancing in my head, I strapped it to the roof of my Rav4 and brought it home.


A few years back, my sister forced asked me to help her re-screen the slider on her back door, so I was familiar with the process. But I didn't really need a screen door. Instead, I was imagining it as more of a room divider or decoration, so I wondered if I could use the rubber stripping to secure something else besides screening material. The tools cost just a few bucks at your local hardware store. Since I wasn't sure the size of the channel in my wood screen, I bought this handy 3-sizes-in-one kit.


Then I found some fun chevron fabric and a decorative knob and number plate. As for the screen frame, I decided to try something different. If you know me, you know I usually paint every piece of wood I can get my hands on, but this time around I just rubbed some dark wax on it. It was quick and easy and very forgiving. Not that some creamy off-white paint wouldn't have been fun, too.

Attaching the fabric was pretty easy. I just laid the screen down and then draped the fabric over it, face down. I then laid the rubber stripping on top of the fabric covered channel in the wood and used the roller tool to push it into the channel. I worked my way around, pulling the fabric taut as I went. Then I trimmed the excess fabric. Simple as a pimple, as my Grandma Ruby used to say!

Here's the final result:

 
 And a close-up of the hardware:


Now it's in my booth at Tennessee Antique Mall, ready to find a new home!


Sunday, April 21, 2013

Part-time Party Planner

By day, I'm a freelance writer and editor. In my off hours, I have several part-time gigs that feed my creative side. There's my booth at Tennessee Antique Mall and the free decorating advice I offer to friends (usually solicited). Then there's my role decorating for various events at my church, The Village Chapel here in Nasvhille.

From potlucks and women's retreats to chili cook-offs and Christmas, I've spray-painted cardboard letters, set branches in buckets of Quikrete, fluffed fake Christmas trees until my hands bled and used more burlap than a Brazilian coffee farm. I love it!

Most recently was our TVC Church-wide Game Night and Finger Food Potluck. (I tried to get them to add a few more adjectives to that title, but they wouldn't.) We don't spend a lot on decorating, so it's a bit of a challenge, but there's always enough of a budget for some fresh grocery store flowers, table runners, ribbon and signs. 

I immediately imagined a picnic theme, so I hit up Hobby Lobby and bought a roll of red checked plastic tablecloth material and some ribbon. I usually supplement with pieces I borrow from my own house. Chalkboards, crates, jars, metal locker baskets. fabric and other stuff is loaded in my SUV and lugged to the St. Bernard building, the old convent where we meet. This time around, though, I was given the "OK" to purchase a few decorative pieces and a bunch of various sizes of mason jars that we can store and use again, so my house was left pretty much intact.

The bistro-style chalkboard was my favorite find, and it was the first thing people saw as they walked in the door.


Here's the main table, waiting for all the fun finger foods to arrive. I found the white crate (used here as a napkin caddy) at Hobby Lobby, and the utensil carrier came from Target. The signs were simple letters printed in typewriter font onto pages I cut out of a discarded book and attached with black clothespins to some jute twine tied to two water-filled mason jars (if I had more time, I would have filled them with rocks or marbles to add some color or texture). Finally, I bought some red plastic baskets food baskets to corral any loose chips, crackers or cookies): 


For the "games" table, I found an old Monopoly board to get things started:


I also took a small piece of sheet metal from Home Depot and bent the bottom four inches back to make a stand-up sign/magnet board (use a table edge to get it to bend in a straight line). Then I attached a rectangular piece of chalkboard from an easy-to-apply adhesive roll. I wrote on it with one of my favorite recent  finds, a chalkboard marker. They come in a variety of colors and wash off with water. Best of all, there's no dusty mess like with chalk.


Some of the best ideas are born out of necessity. I had meant to hit up Home Depot one more time for some galvanized metal tubs to hold the bottled water, but I ran out of time. That's why I was frantically looking around my house on Friday afternoon, 30 minutes before I needed to be at church. I managed to dig up one smaller white drink tub filled with small frames and art pieces waiting to be used. Unfortunately, I knew that wouldn't be enough to hold the 100-200 bottles of water we needed to put out. Then it hit me - almost literally. I've started hoarding collecting drawers, and my studio and guest room are currently stacked almost to the ceilings with drawers pulled from two different discarded desks. It's hard to even get around in those rooms thanks to all the free salvage I've scored lately, including a really cool dresser a friend rescued from the trash for me (I REALLY need a garage). So, I grabbed two black desk drawers with some cool hardware on them and tossed them in the car. Here's a (blurry) close-up:


I fought my natural tendency to do too much and it paid off. The room was ready nearly 30 minutes before people were due to arrive and I was actually able to sit down and enjoy the night. I even found time to grab a board game and join in the fun. My friends and I gave the Sweet Valley High game a "D-" but the night overall earned an "A."

Sunday, December 2, 2012

Last-minute Christmas Orders!

If you're looking for last-minute Christmas gifts from Punctuation Studio, you need to contact me soon! Choose from hand-stamped necklaces in sterling silver or nickel and stamped spoon-handle necklaces. As always, I can customize them with meaningful words, names, phrases and charms. And don't let the chains distract you. I have several different options, so you can mix and match.

Spoon-handle Necklace ($50):


Sterling Silver Compass necklace ($75):


Name Necklace (sterling - $45 & up; nickel - $25 & up):


Phrase Necklace (sterling - $45 & up; nickel - $25 & up):


Precious Metal Clay - this is 99% pure silver that comes in clay form. I shape it and stamp it by hand then fire it in a kiln and polish to get the results below (necklace $65; earrings $35):


Friday, October 5, 2012

A Non-artist's Art Show

I have no illusions about what I do and who I am. I'm not an artist. I don't sit down at a blank canvas and make something from nothing. What I am is a finder of things, a rescuer of cast-offs, a person who can see potential and make things that already exist into much better things. I don't "create" so much as "assemble."

And I'm fine with that. 

I recognize that it's a gift not everyone has. Some people can't see beyond the dirt or scratches or broken pieces. My eyes, for whatever reason, see what could be. I love bringing pieces back to life or putting components together in interesting ways.

But that doesn't mean I think I'm an artist. So when I was asked to take part in an art show -- even a church art show -- it made me nervous. Still, I was in a bit of a rut and really needed a challenge to get me through the sweltering southern summer. Before I had time to think too much, I accepted and set to work gathering pieces that I could rescue and redo. 


After several months of collecting at flea markets, yard sales, estate sales and my own personal stash, I ended up with 15 pieces total -- a combination of distressed mirrors, repurposed chairs, old trim pieces, frames and wooden drawers -- all painted, sanded, glazed and messed with in a variety of ways. 

It felt good to know that I could actually finish that many pieces at once, but that didn't mean anyone would like them. Sleep-deprived and worried, I loaded my car and headed the few miles over to The Village Chapel, my church home, which meets in a cool old convent. I'd be sharing space in our gallery room (aka The Living Room) with my longtime friend Kim Thomas, who IS a real artist. She had done a series of abstracts for this show, and I wasn't sure how my crazy creations would mesh with her very adult artwork. 

Even through our bleary eyes, we could see that our pieces complemented each other in a way that made it seem like there was some advance planning on our part, which there wasn't. That hurdle overcome, we set about figuring out how to best display everything. It took the better part of the day, a few Chipotle burritos and several of my beloved McDonald's fountain Cokes to get everything hung (full disclosure: I mostly just supervised and made Coke runs while the talented Elizabeth Foster did her thing). In the end, it looked like this:


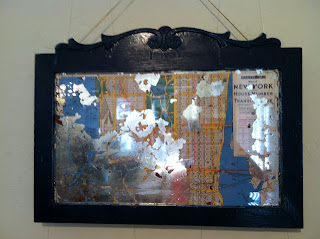
It actually looks like a gallery, doesn't it? I was as surprised as anyone, not that I don't have pieces that I'm proud of. I think my favorites (aside from the NYC mirror above) are these three chairs. We hung them with little wooden pulleys I found during a recent flea market outing, and I have to say they actually look like art! 
 

Here's a before picture of the chairs, so you can see how far they've come: 


The next day, we had a reception after each service and people said nice things and even bought a piece or two. Everything will remain on display through November, at which point I'll bring it home and the unsold pieces will migrate to my antique booth at Tennessee Antique Mall. 

I still feel a little uneasy about the whole thing, like I'm masquerading as something I'm not, but if beauty is in the eye of the beholder, I guess art can be too.


Sunday, June 3, 2012

Silhouettes Aren't Just for People

I have wanted to make a silhouette portrait for AGES, but I kept putting it off. I was afraid it would be hard. And complicated. Or worst of all, I might waste a bunch of time only to have it end up not looking good. Also, I didn't have an overhead projector, and that's how we did it in elementary school, so I had it stuck in my head that that's how it should be done. 

Well, I hate to admit this, but often my biggest motivator is having something else I should be doing. So while I was procrastinating on another project (probably a writing deadline or laundry), I decided I would try to make a silhouette of my Puglet, Conner (in case you're wondering, a Puglet is a Pug-piglet combo, i.e. a food-obsessed, piggish little Pug). 

I was curious to see if I could find an easy way to do this, and still wind up with something that I wasn't embarrassed to show others. To start, I pasted just a regular old digital image of Conner into a Microsoft Word doc. I stretched one corner and made it as big as I could fit on the page. Then I printed it out on some grey cardstock I had leftover from my church's women's retreat. (It wasn't even a good printout because I was running out of black ink and the grey paper made the whole thing look a little muddy. Fortunately, that didn't matter.)

Here's the picture I used:


He's adorable, right? Conner was a rescue, and it's true what they say about rescues being so grateful to finally have a good home. He's so cuddly and sweet -- even if does like to pee in the laundry room because he's too lazy to go outside.

Now back to our regularly scheduled project ... While I sat and watched TV, I used a small pair of embroidery scissors to cut out Conner (you can also use manicure scissors or any craft scissors that can handle fine details). I did one of his whole body and one of just his front half, cutting a fancy, silhouette-y swoop at his neckline. When I was done, I flipped them over and was pleasantly surprised to see that they actually looked like Conner! 

Just one problem: They were on that icky grey cardstock. Before you get carried away and think you can just print on black paper, think that through. It's important to use a light colored paper so you can see the image you're cutting out, but that's not the best finished look. I knew I wanted my finished project on a dark background, so I grabbed my trusty matte black spray paint, headed outside and applied a few squirts. I wasn't sure what it would do to the cardstock, but it worked great ... until the wind came up in my front yard and blew my masterpieces behind the trash can. Ugh. They survived, though. Whew!

Next up was mounting and framing. I found this great oval frame at a local estate sale for a few bucks, but I can't leave anything alone, so I covered it in glossy red spray paint. Much better, right? Then I cut some patterned craft paper in an oval and attached my cutout of Conner's head. 

Here's the finished product:
 

Isn't he handsome? Yeah, I know.

Tuesday, May 22, 2012

Decisions, Decisions

To quote the band Gomez, "at least I've got options."

You see, last year, after more than seven years in this house, I finally put a table in my kitchen. I'm embarrassed to admit it, but as a single girl, I usually just eat in the living room, often in front of the TV. Then I fell in love ... with a cool, used butcher block-like round table top at a local restaurant supply warehouse. They wanted $50 for it, which seemed a little pricey to me, but it was so solid and in great shape. Plus, it easily fit in the back of my Rav4, so I assumed it was destiny and brought it home. I thought I might go the "diner" route and use a black metal base to finish it out. After all, it was a cheap option, readily available, and I could always paint it. Here's what that looked like:


Then, just a week or two later, I stumbled upon an oak pedestal base at an out-of-the-way antique shop. It was languishing on the porch and they let me have it for the bargain price of $25. So for $75 total I would have a pedestal table that was less than half of any I had found online, and it was smaller, which was a bonus because my cottage kitchen stretches the definition of "eat in." The metal base was out. This was definitely the way to go:


Now I just needed to paint it. I used a gray primer and then tried several different colors of aqua before finding the right one. Next up I distressed the table a bit with my palm sander to get the wood and the primer to show through in spots. After that, I rubbed in a gray-tinted glaze, wiping most of it off. (Confession time: I didn't want to buy more paint and didn't have any gray, so I actually just mixed some of my gray primer with a glaze base and it worked fine). I finished with a coat of poly. I'm usually too lazy impatient to seal my painted pieces, but I knew that a kitchen table would get a lot of wear, so I took the time. Here's the result of all my hard work:


I know, right? Even I was surprised by how much I loved it. If you're an observant reader, you might have noticed that I just used the past tense to describe my feelings for my table. That was no mistake. I still really like it, but now I'm thinking maybe we should just be friends. You see, a new table came on the scene this week. It's a teeny, tiny bit bigger, has an apron (which makes it look more finished) and really cute curvy legs, not to mention the tiniest casters ever (Confession #2: I'm obsessed with furniture on wheels).

I won this amazing pedestal table in an online auction for $80 and I'm definitely in love. This find was a little harder to get in the Rav (it involved sweet-talking a biker into letting me borrow his Swiss army knife to undo a few bolts and take it apart before it would fit), but nothing comes between me and a great find. I'll end the suspense now and show you a picture:


Of course, I don't need two tables, so I'm planning to sell one in my antique booth and keep the other. At this point, I'm definitely leaning toward keeping my new find and selling the painted table. Then I'll paint the newcomer, most likely the same hue as it's predecessor.

So what do you think? Am I crazy? Are you secretly pulling for table #1 to stay put? What color would you paint my new find (or would you leave it unpainted)? Inquiring minds want to know.

Thursday, May 10, 2012

Riddle Me This...

I bought these vintage film containers at the Nashville Flea Market a few months back for $8 each. 


You're jealous, right? I thought so. But the big question is, what to do with them? After all, I don't have a real need for old reel-to-reel storage. Fortunately, inspiration struck and I came up with a (hopefully) great idea for transforming them. Before I proceed, though, I thought I'd give you guys a chance to weigh in. How would you repurpose this cool recent find?